- As seen on
-

-

-

-

The appearance and function of a classic Chevelle’s center console is an area of prime importance because the console is both highly visible and an essential control component at the same time. The center console is also one area of the interior that can look really great when restored to original specs. Chevelles with worn-out or damaged center consoles as well as those that came from the factory without center consoles at all, can both benefit from the installation of a complete new console assembly. That’s why Original Parts Group, Inc. (OPGI) now offers complete center console reproduction kits for the most popular Chevelles.
Each individual kit component is an exact factory reproduction, and the console kits are guaranteed to meet all OEM specifications for fit, finish and functionality. The injection-molded consoles bases are precisely reproduced and the mounting points and all related hardware are perfectly proportioned. The console finishes include factory-authentic grains, enamel-baked satin black paint, bright chrome accents, and brushed aluminum fascia, making them virtually indistinguishable from the original factory parts. Whether you own a Chevelle equipped with a manual, Turbo Hydra-Matic, or Powerglide transmission, there is an OPGI premium reproduction Complete Center Console Kit ready for easy installation in all 1966 to 1972 models. All of the reproduction center console kit components can be ordered from the OPGI catalog separately, but the complete center console replacement kits usually represent the best deals.
For this installment of the OPGI Blog we’re going to take a look at the assembly of a 1970 Chevelle Center Console Kit part S6872L. This kit is for use with Turbo Hydra-Matic transmissions and comes complete with a new shifter assembly.

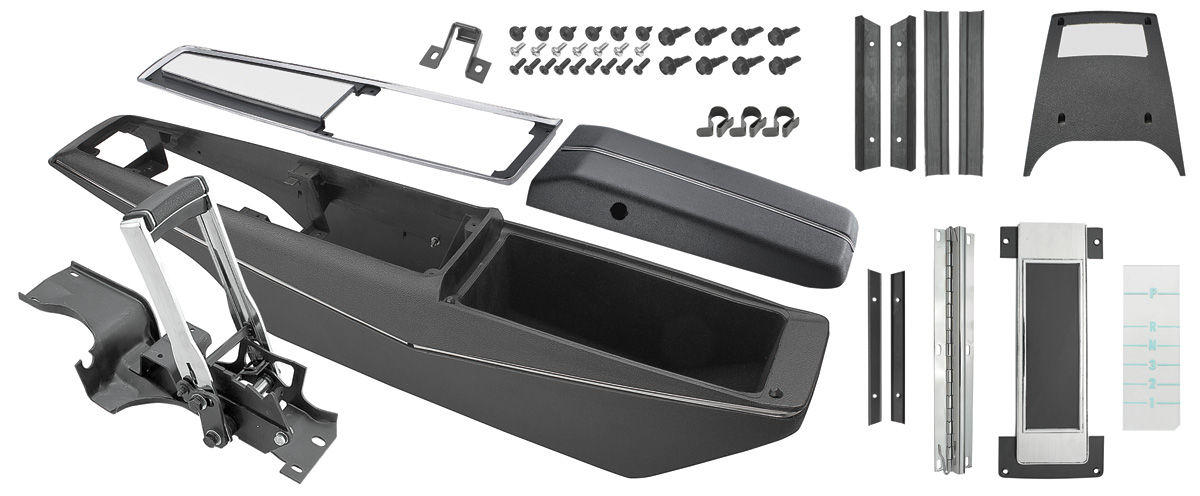
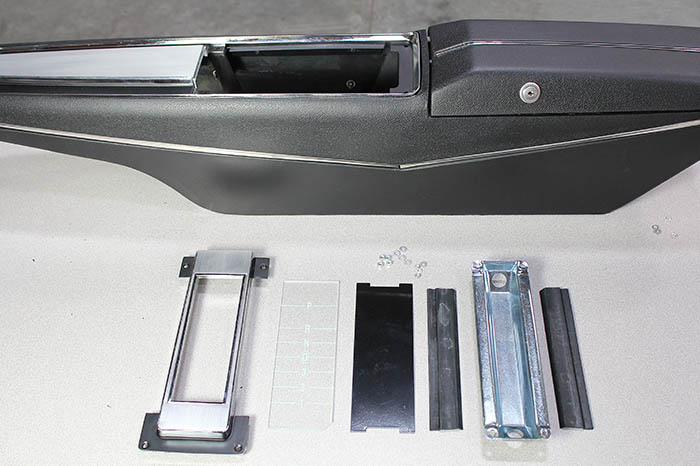
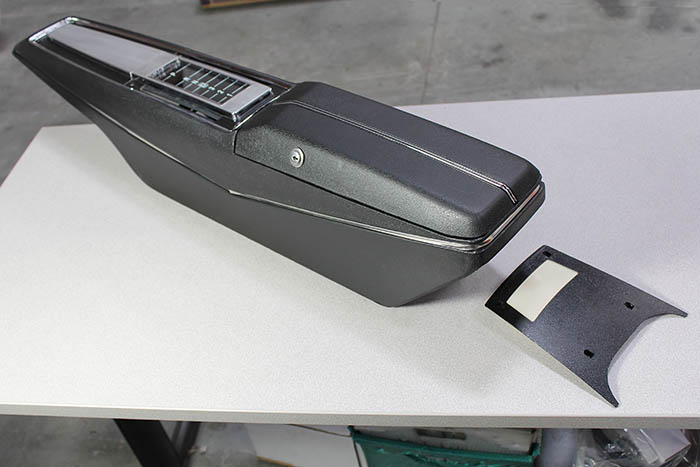
1. This kit includes everything needed to replace your center console including the console base (complete with chrome surround trim) console door and hinge, back light assembly (bulb not included), chromed and brushed aluminum finished top plate, Turbo Hydra-Matic indicator lens, brushed aluminum automatic plate dial assembly, console sealing strips, console lock latch, console screw kit, and console mounting bracket.

2. Because we are adding a new center console to a 1970 Chevelle that originally was equipped with a column shifter, we added the following additional parts necessary to make console replacement kit S6872L into a complete conversion kit:
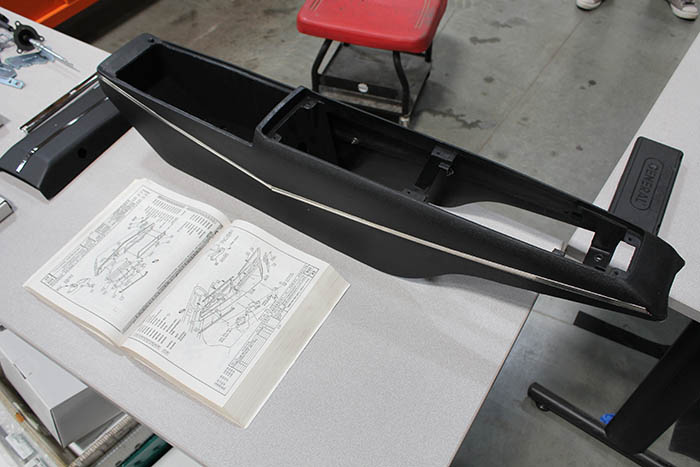
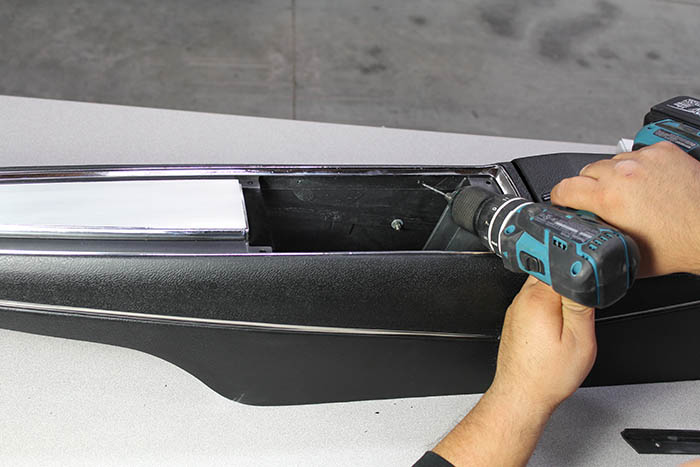
3. Here the console base is prepared for assembly with the assembly manual turned to the correct page for reference.

4. The console base has pre-marked dimples indicating where the hinge holes need to be drilled.
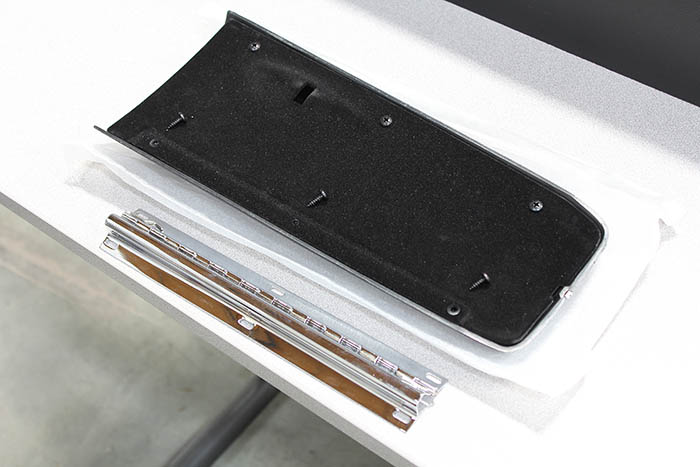
5. Here is the complete console door before disassembly.

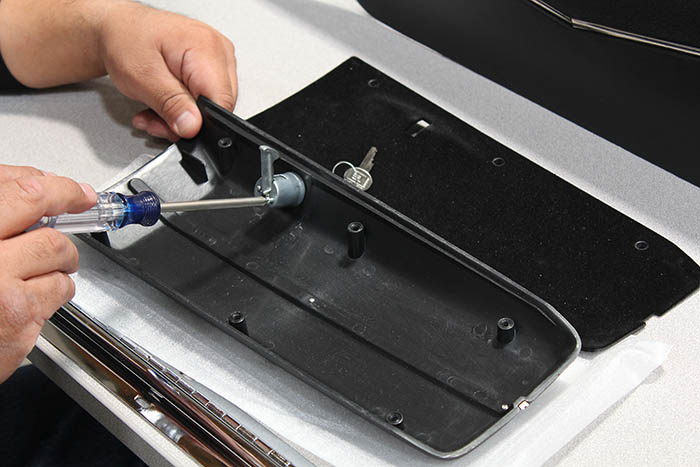
6. The console door cover needs to be removed before the lock can be installed.

7. The lock is installed with the retainer and the included crew is used to secure the lock to the door.
8. Here is the console door fully assembled and ready to go on with the hinge, cover, and lock installed.
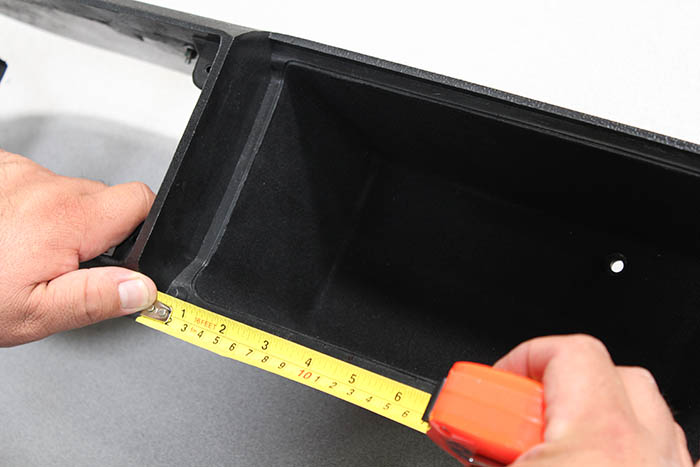
9. The easiest way to align the catch on the body of the console to the lock on the console door is to measure from the center of the lock hook to the front edge of the door and transfer that over to the console base. The measurement should be about 4 1/2” inches.
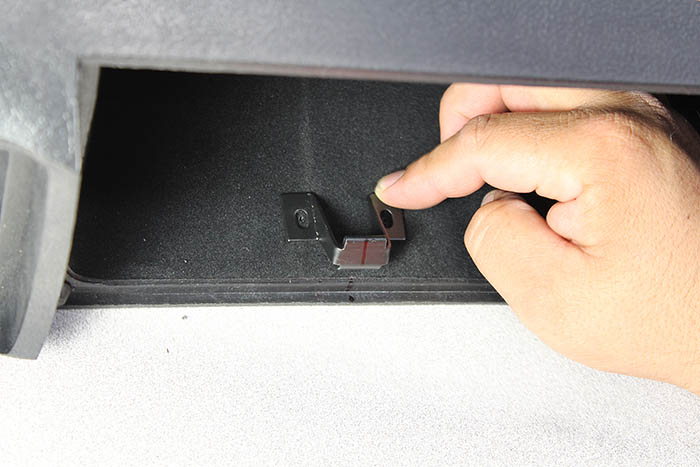
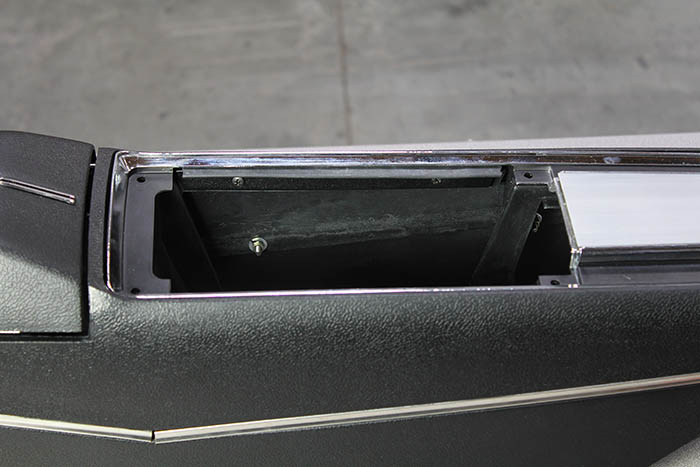
10. Next, mark the console and center lock catch to locate where the holes should be drilled. Drill the holes and mount the catch.
11. Here is the console with the door installed.

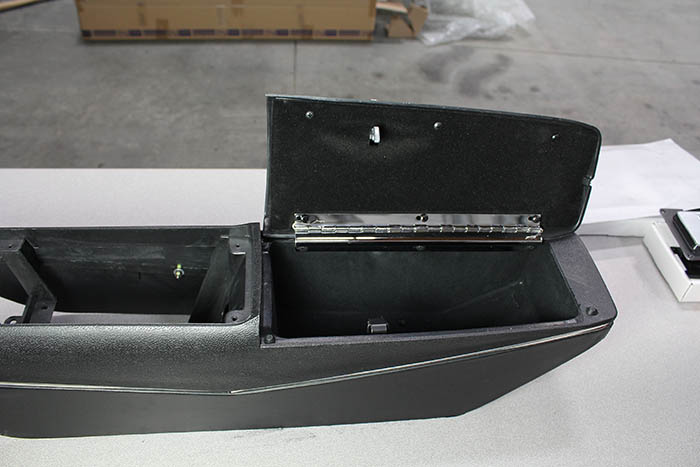
12. Here is the console door installed and in the closed position, showing good alignment with the lock and even “gaps” on all sides.
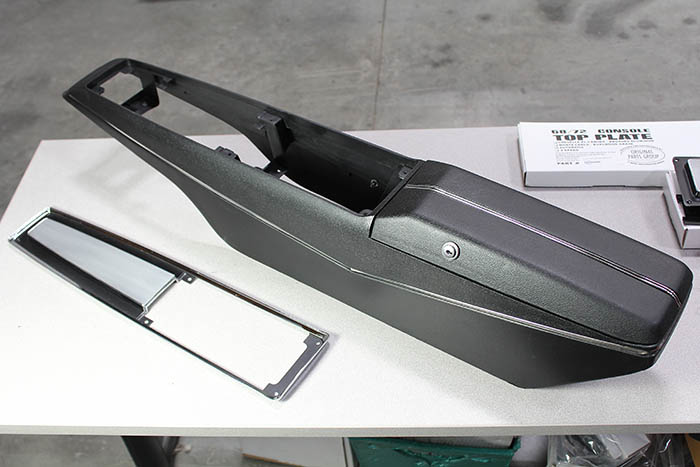
13. Console base is shown with top plate ready for installation.

14. Here the console top plate is in position but it cannot be fully installed until the dial assembly is in position.

15. The dial assembly components are ready to install.
16. To install the seal strip, use the metal retainers to mark and drill the hole locations. Be sure to align the rubber seal strips with the bottom edge of the console top plate.
17. Here is the console with the seal strip installed in the correct position.

18. Console is shown with both seal strips installed.
19. Console is shown with both seal strips installed.

20. Indicator assembly components should be assembled with the assembly housing on the bottom. The overdrive indicator lens (supplied in CH24952 conversion kit) goes on next followed by the back plate, rubber seal strips and lamp housing.
21. Indicator assembly is completed by threading on the supplied nuts and washers.

22. The indicator assembly is installed on the top plate using four supplied screws from the console hardware kit (note: indicator must be removed when installing console over the shifter).
23. Here the console is shown with the top plate and indicator assembly completed.
24. The rear console lamp is installed using 4 screws supplied in console hardware kit.

25. Here’s how the console looks with the rear lamp installed.

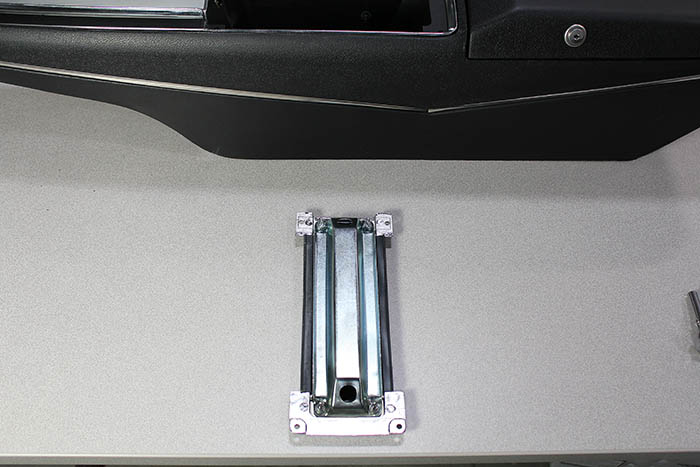
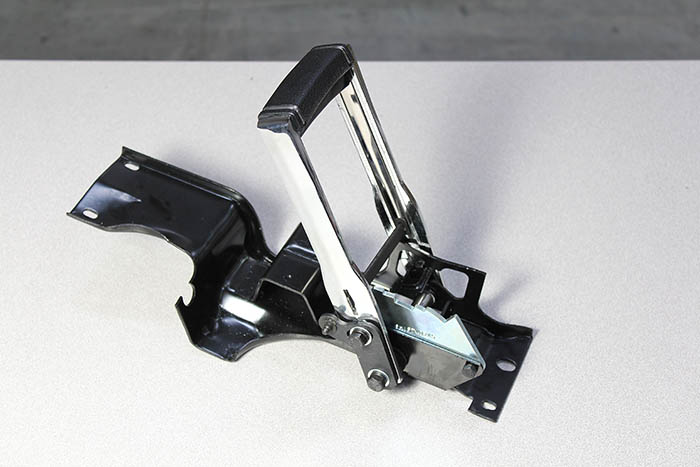
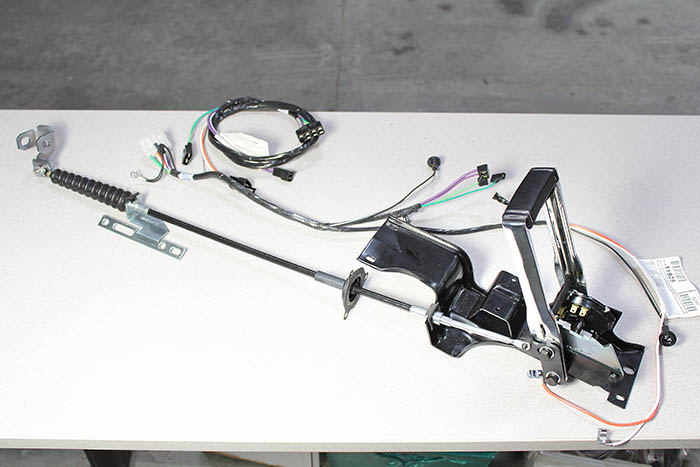
26. Here the shifter assembly is shown ready for installation along with the assembly manual for reference.
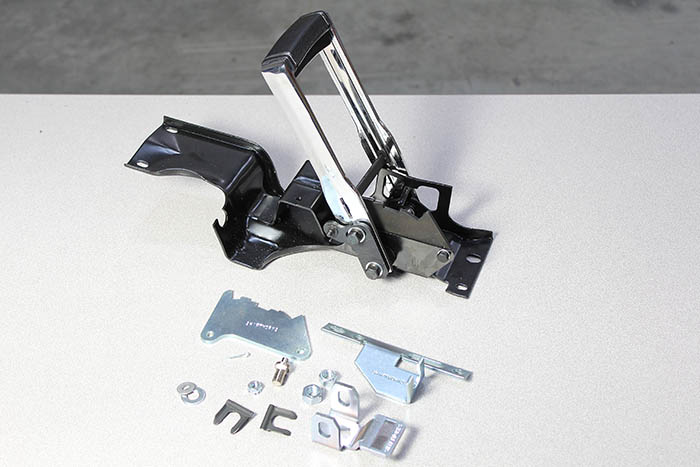
27. Here the shifter assembly is shown along with the CH24952 shifter conversion kit components.
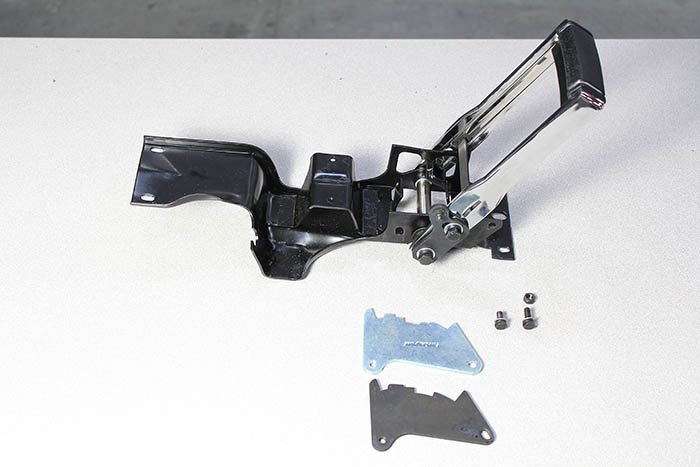
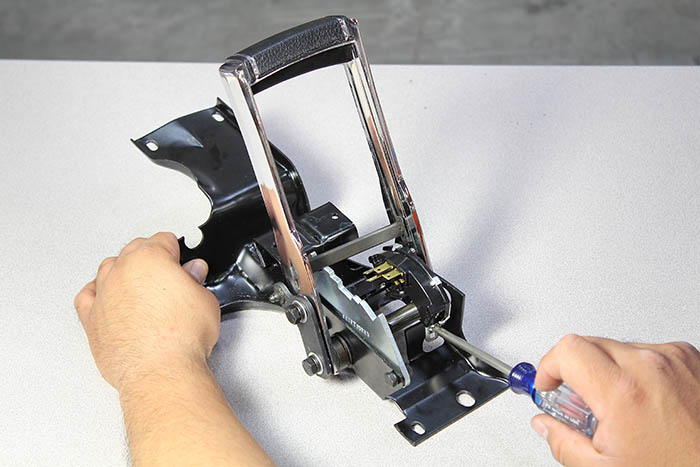
28. The existing shifter detent plate must be swapped for the new detent using the existing hardware.
29. The shifter assembly is shown with the new detent installed in place.

30. The neutral safety switch must be installed on the shifter assembly. When converting from column to floor shift, the neutral safety switch/back up light switch moves from the base of the column to the floor shifter. In this example we used a new neutral safety switch, but your existing switch can be used if desired.
31. The neutral safety switch must be attached to the shifter assembly. The switch has an adjustable mounting position. The final position cannot be determined until the shifter is mounted on the floor with power running to it to ensure that the reverse lights and neutral safety position indicator are properly aligned to the shifter detent and transmission indicator positions (to insure that the car cannot be started in drive or reverse).

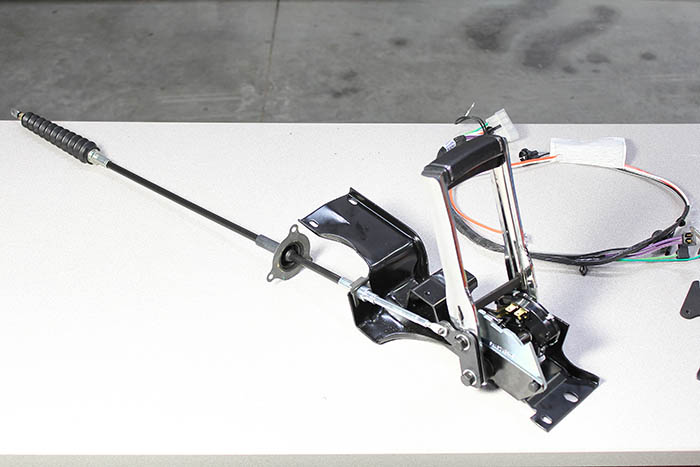
32. The shifter, cable, and harness are shown in “bench install” position as these parts typically don’t get mounted until the shifter is installed in the car.
33. Install the cable to the shifter body using clips from BH2205 kit. One clip is used on the shifter body and one is used on the transmission cable bracket.
34. The shifter cable is mounted to the shift handle assembly using the proper E clip and cotter pin. A factory style c clip can also be used here.
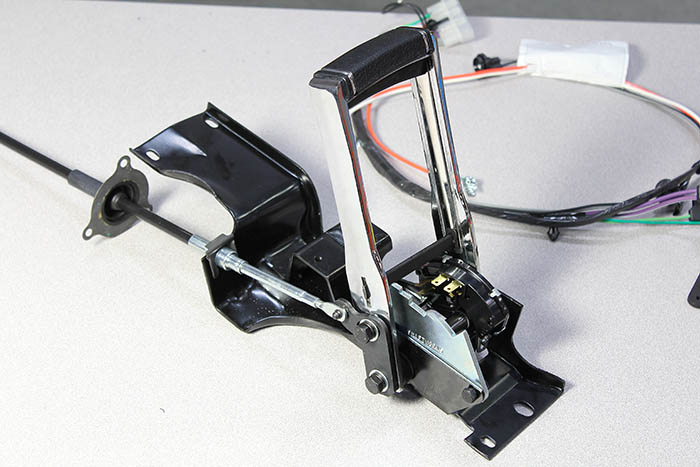
35. The shifter assembly is shown complete with cable and transmission components installed.
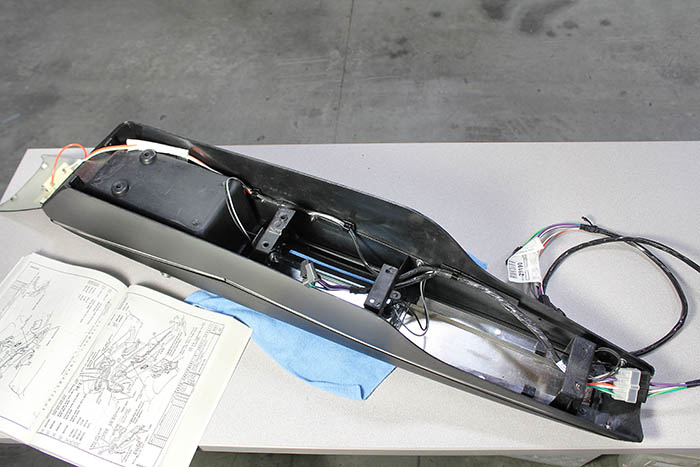
36. Use the three wiring harness retainer clips supplied in the kit to install the wiring harness to the inside of the console base. The harness connects to the rear lamp (bulb GPE0036), and the front of the console harness connects to the console harness extension.

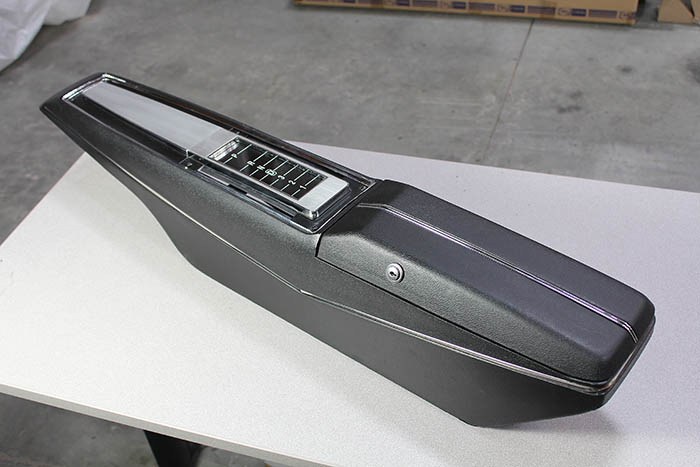
37. Here is the completed center console with shifter assembly ready to be mounted in the car as a complete unit.
We utilized Center Console Kit S6872L in this assembly. The kit is a complete replacement and contains everything needed to replace a 1970 Chevelle center console. Kit S6872L comes complete with the shifter assembly. For information on specific applications and pricing, visit OPGI.com or contact your OPGI sales representative toll free at 1-800-243-8355